How to add documents on the web
Navigate to Documents in the left side bar on the web app.
In the top right of the Documents page, click Add Document.
To add an E-sign document that you need your staff to sign by a certain date:
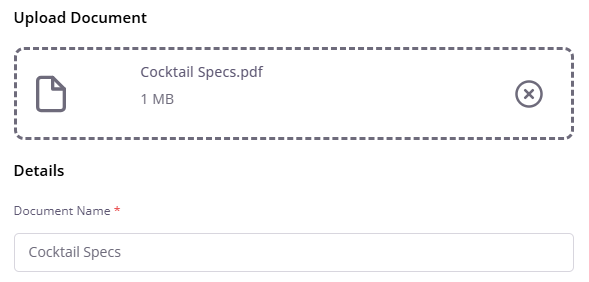
Add a document in PDF or Word format by either drag and drop or clicking on Choose a file or Browse Files, which will open your files.

The Document Name will automatically populate with the name of the file you’ve uploaded, but you can change this if you’d like.

Select the sites to assign the document to and any categories from those sites.
Categories act like files in the case of documents, making sorting and searching easier.
Under Configuration, select Yes for Signature Required?
Select how many days from when it is assigned the document will be Due. For example, if you enter 5 days then it will be due 5 days from today or 5 days from when it is assigned to a colleague at a later date.

Then, select your Review Date. We’ll give you a reminder to review the document at this date.
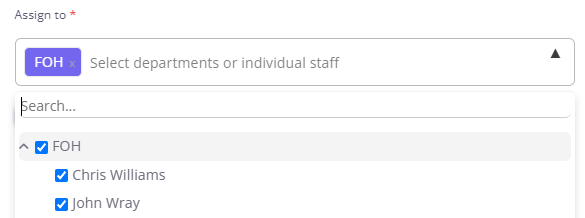
Now, it’s time to Assign the document to the relevant colleagues. Click on the dropdown to display the departments.
You can assign the document to entire departments by ticking the box next to that department. You can also assign to individuals from departments by clicking the downward facing arrow which will open the list of colleagues in that department.

When assigning to entire departments, you can Automatically assign to new staff in selected departments by ticking the box for this option. By doing this, any staff who join in the future will automatically be assigned the document and it will be due in the amount of days you set.
Click Assign document.
To add documents that only need to be viewed and do not need to be signed:
Add a document in PDF or Word format by either drag and drop or clicking on Choose a file or Browse Files, which will open your files.

The Document Name will automatically populate with the name of the file you’ve uploaded, but you can change this if you’d like.

Select the sites to assign the document to and any categories from those sites.
Categories act like files in the case of documents, making sorting and searching easier.
Under Configuration, select No for Signature Required?
Tick whether you want to assign to All Staff or only to Site Admins at the selected sites.

Then, select your Review Date. We’ll give you a reminder to review the document at this date.
Click Assign document.


